
Kling 4.0 gives AI video creators more room to direct a complete scene: up to 30 seconds per generation, 10 keyframe images, and richer control over reference assets, performance, and editing. The biggest changes are about directing a result—not just producing another beautiful clip.
Kling 4.0 was available in an earlier rollout before Kling announced broad access on October 15, 2026. This guide focuses on the confirmed changes, compares full Kling 4.0 with Flash and Kling 3.0, and explains how to choose the right workflow. Native audio and multi-shot storytelling existed in 3.0, so those are not presented as first-time features. Official model announcement
This guide focuses on the six upgrades most useful in practice, including where the full model and Flash differ. Short examples show how to prepare references, specify camera movement, and revise a nearly finished shot.

What’s new in Kling 4.0?
1. Thirty-second generation gives performances more time
Kling 4.0 supports 3–30 seconds per generation, adjustable in one-second increments. Kling 3.0's published range is 3–15 seconds. The doubled ceiling can accommodate a longer action, an emotional pause, or several connected beats without immediately requiring another clip.
The practical gain is continuity. A single generation can attempt to carry the same character, room, lighting, and sound through the whole scene. It still needs review: extra duration also gives identity drift and weak transitions more time to appear.
Longer does not have to mean busier. Give the extra seconds to an action that benefits from duration—a slow realization, a careful movement, or a reaction after dialogue—rather than filling every interval with a new event.
2. Up to 10 keyframes provide visual anchors
The dedicated Keyframes entry supports first, last, and intermediate frames at specified times, with up to 10 image inputs. You can define the important visual states, then describe what connects them.
This is useful when the reveal or ending must land in a particular composition. A sequence might begin with an empty doorway, reach a character's reaction in the middle, and end on the object they discover. Each image should serve the same scene rather than introduce an incompatible style or location.
Choose your entry point before preparing assets. The guide distinguishes Keyframes from Omni Reference and says their capabilities cannot be combined within one task. Keyframes accepts images; it does not accept additional reference assets through that dedicated entry.
3. Omni Reference combines identity, movement, and voice direction
Omni Reference lets different assets contribute different information. One image can define a character, another the location, and a video the camera path or action pacing. The guide recommends explicitly naming those roles with asset references such as @Image1 and @Video1.
The capacity rules matter:
- 15 reference assets maximum in total, across images, videos, voice profiles, and elements.
- Up to 10 images, 5 videos, 7 elements, and 3 voice profiles, subject to that combined ceiling.
- Reference videos, editing videos, and video elements share a quota of 5 clips and no more than 30 seconds combined.
These are overlapping limits, not quantities you can add together. Audio input currently supports voice profiles; the guide says uploaded background music and sound effects are not supported. Describe those sounds in the prompt instead.
4. Stereo audio and wider framing support richer scenes
Kling lists two-channel stereo, improved lip sync, and support for additional languages, including German, French, and Hindi. Its supported accents and dialects include Cantonese and several English variants. The creative benefit is more specific performance direction: who speaks, how they sound, and what the surrounding space sounds like.
The full model lists 720p, 1080p, and 4K output, plus 21:9, 16:9, 1:1, 9:16, and Auto aspect ratios. A wider frame can help establish distance between characters or leave room for an entrance. It also requires a separate composition plan if the final video will be vertical.
Kling’s current user guide lists 10-bit HDR for supported 1080p and 4K modes. Availability may differ by interface and account; check the live controls before promising this format to a client. Video extension up to two minutes is described separately from the documented 30-second single-generation limit.
5. Targeted editing gives a usable take another chance
The guide describes editing expressions, movement, camera position, style, and backgrounds in existing footage. Its prompt syntax makes an important distinction: “Edit @Video1” requests a change to the clip, while “Reference @Video1” may initiate a new reference-based generation.
For a nearly successful scene, specify one change and what must stay fixed. Then inspect the frames around the edit for new inconsistencies. A selective editing feature can reduce the need to replace a whole take, but preservation is still something to verify.
6. Longer prompts for more complex scenes
Kling 4.0’s guide allows text prompts up to 8,000 tokens. That extra capacity helps describe timing, spatial relationships, acting, camera moves, and preservation constraints in a complex scene. It is not a reason to fill the prompt with generic adjectives. Begin with the subject and action, then add only details that affect the shot. Official user guide
Example editing instruction: “Edit @Video1: shift the lighting to late-afternoon amber while preserving the performer’s facial identity, wardrobe, body motion, framing, and clip timing. Do not introduce new props or change the camera path.” Kling distinguishes “Edit @Video1” from “Reference @Video1,” which can initiate a reference-driven generation instead. Review the edited frames for unwanted changes.
How does Kling 4.0 compare with earlier versions?
Compared with Kling 3.0’s documented 15-second generation ceiling, full Kling 4.0 supports up to 30 seconds, adds a dedicated workflow for up to 10 keyframes, and extends mixed-asset control. Native audio, dialogue and multi-shot storytelling are not entirely new—they were already supported by the 3.0 family.
If you are choosing between Kling 4.0 modes, Flash is designed for faster, lower-cost iterations but currently has a 20-second / 720p ceiling and lacks multiple-keyframe control. Seedance 2.5 is another option for audio-video generation; compare actual reference requirements and editing workflows rather than judging either model by duration alone.
What the creator examples tell us
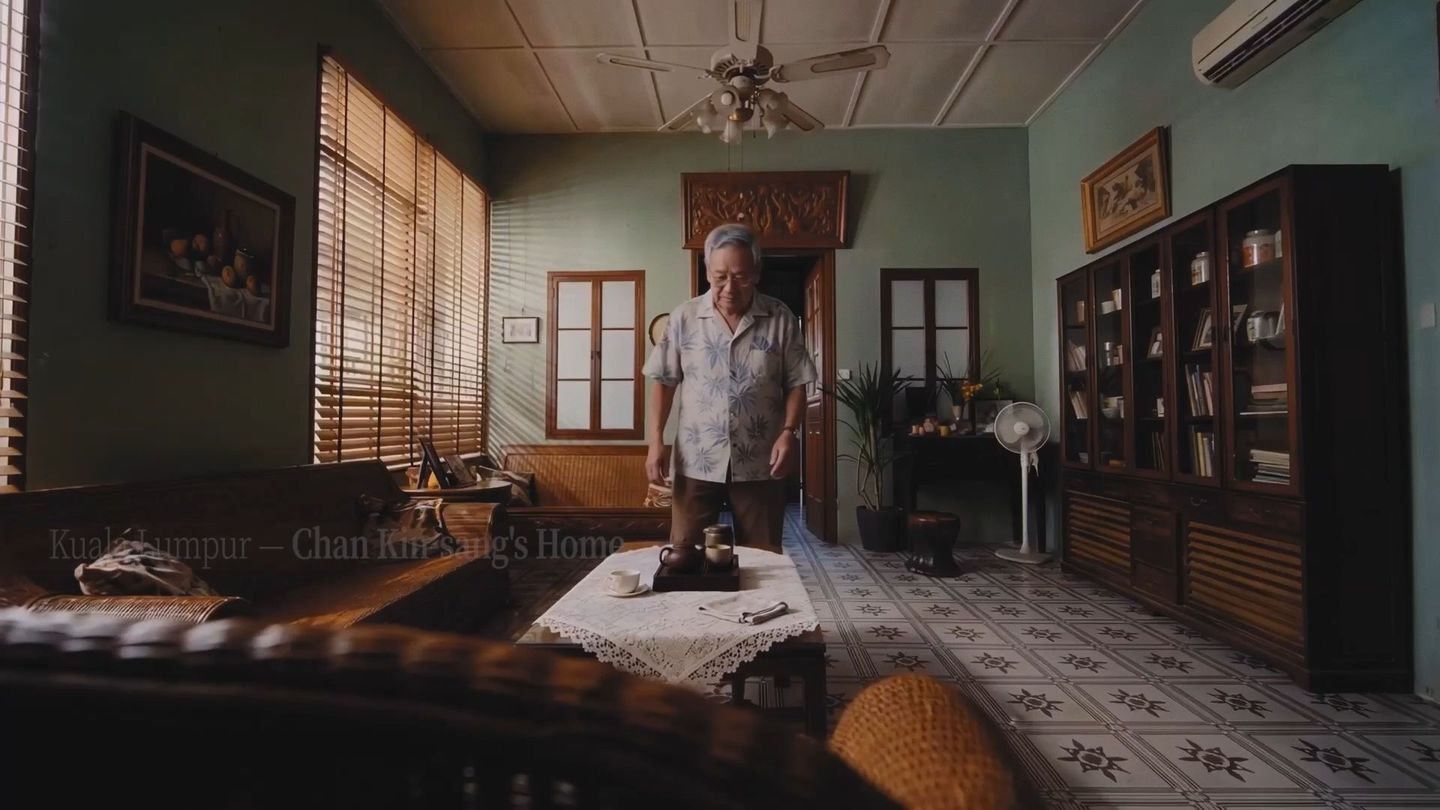
In Kling's published case study, creator Amiraigc describes using 30-second generation, Omni Reference, and keyframes for the short film Tea When You Have Time. He reports more room for an elderly character's actions and stronger consistency across the project, along with convincing Cantonese dialogue.
That is a useful production example because it connects features to a storytelling need: letting a scene breathe. It remains one creator's account published by Kling. It does not establish a universal improvement percentage or eliminate the need to review identity, timing, and speech in your own footage.
Who should use Kling 4.0?
Kling 4.0 is most interesting when your current clips end too early, the story needs specific intermediate visuals, or several references must contribute different kinds of direction. Its strongest updates work together: longer generation creates room, keyframes define the moments, and reference roles guide what stays consistent.
For a complete short film, settle the story and shot list before testing those controls. Decide which moments need visual anchors, then prepare the references for the creation mode you plan to use.
Develop your next scene with Wery.AI
Bring the creative ideas in this article to your next project by exploring AI image and video creation with Wery.AI. Start with a few sentences that define the story: who is in the frame, where they are, what they do, and what you want the audience to feel. Whether you are planning a product film, a character-driven story, or social media content, begin with one scene that has a clear focus.
Next, review your reference materials alongside your shot plan. Establish the character’s appearance, the scene’s color palette, and the lighting, then prepare visual references for the opening, the turning point, and the ending. Describe camera movement, the pace of the action, and sound requirements separately. As you move into image or video creation, a shared goal gives each iteration direction and makes it easier to decide which version deserves further development.
Start with a single shot: choose the image that best expresses your core idea, explore its composition and atmosphere, then gradually expand it into a coherent sequence. On Wery.AI, use clear references and specific creative goals to develop your inspiration into a more complete visual plan.
Related reading: What Is Seedance 2.5? · How to Create AI FPV Drone Videos with Seedance 2.5